Tuesday, May 22, 2012

Cauliflower crust pizza!!!!

I saw this recipe today and, since I have a head of cauliflower laying around, thought I MUST try this!  So I am posting it here to be able to remember it.  Perfect for gluten-free pizza!  It has rave reviews too.  And if you want to make it even healthier?  Try doing a 1:1 ratio of steamed broccoli puree with marinara for the sauce!  Recipe here:  http://www.pinchingyourpennies.com/2012/05/cauliflower-for-the-pickiest-eaters-yep/

Cauliflower Pizza .
Ingredients
.
1/2 Head of cauliflower (mine was a smallish head)
2 C shredded cheese divided (I used mozzarella, but any medium/hard cheese will work)
Italian seasonings (I used oregano, parsley, fresh garlic and some onion)
1 egg
Pizza sauce or marinara sauce of your choosing
Toppings (we used sausage, black olives and pineapple)
.
Instructions
.
Grate your cauliflower. I used a food processor with the grater blade (cause you don’t want it to become pureed, just shredded). Place the grated cauliflower into a medium microwave-safe bowl and microwave for 6-8 minutes (depending on your microwave). You want to make sure the cauliflower is soft but not mushy. Do NOT add water or anything to the cauliflower.
.
While the cauliflower cools off (I put mine in the freezer to cool it quickly), preheat the oven to 450* and prepare a cookie sheet or pizza pan by spraying it with cooking spray. This is also a good time to prepare your toppings – cook your sausage, cut up your pineapple, whatever…
.
To the cauliflower add 1 C shredded cheese and spices and combine. Add egg and mix well with your hands. Press the crust onto a pan and shape into a 9-12″ pizza (depending on how thin you want the crust). I did mine closer to a 12″ and it worked great! Spray the top of the crust with cooking spray (to help brown) or brush with oil.
.
Bake the crust for 15 minutes (or until golden brown). When you pull out the pizza, turn your oven to broil.
.
Add your toppings (we did 1/2 sausage and 1/2 pineapple/black olive) including 1 C cheese and put pizza under the broiler for 3-5 minutes. Just broil it long enough to melt the cheese and caramelize the toppings a bit.
.
Seriously delicious! My husband will eat cauliflower, but doesn’t love it. I am one of the pickiest eaters on the planet. My daughter is another one of the pickiest people on the planet. We ALL loved it!! I made this Sunday and they are already asking for it again!! Cauliflower! Who knew??

Tuesday, March 6, 2012

Wisconsin Cauliflower Soup

I got this recipe off www.utahdealdiva.com and have already made it a few times (and am making it for dinner tonight!).  I've decided it's my favorite thing to make with cauliflower.  You can get this soup at Cafe Zupas too, and we all know how good their food is!

Wisconsin Cauliflower Soup

2 tablespoon butter or margarine
1 medium onion, chopped
1/4 cup all-purpose flour
1/2 teaspoon salt
2 cups milk**
1 1/2 cups water**
1 can (13 3/4 to 14 1/2 ounces) chicken broth
1 head (2 1/2 pounds) cauliflower, cut into 1-inch chunks
1 teaspoon Dijon mustard
1 cup sharp cheddar cheese, shredded
1 cup Pepper Jack cheese, shredded

**Can substitute 1 can {12 oz} evaporated milk and 2 cups water for the 2 cups milk and 1 1/2 cups water.

In a large saucepan, melt margarine or butter over medium heat. Add onion and cook until golden, about 10 minutes, stirring occasionally. Whisk in flour and salt. Gradually stir in milk, chicken broth, and water.

Add cauliflower and heat to boiling over high heat. Reduce heat to low; cover and simmer until cauliflower is tender, about 15 minutes.
In blender (with center part of blender cover removed to allow steam to escape), blend cauliflower mixture at low speed in small batches until very smooth. {Don't let this step deter you from making the soup! Blending it is really easy and so worth the extra 3 minutes. The most annoying part are the added dishes!}
Return cauliflower mixture to saucepan; heat over medium heat until hot, stirring occasionally. Remove saucepan from heat; stir in mustard and 1 1/2 cups cheese until melted and smooth. Serve soup with remaining cheese as a garnish.
Enjoy!

Monday, April 25, 2011

Easy Healthy Homemade Granola Bars!

I got this recipe off http://www.pinchingyourpennies.com/2011/04/easy-healthy-homemade-granola-bars/.  At first I thought, whatever, it'll have tons of sugar or corn syrup in it, but it doesn't!  Wow!  I haven't made these yet, but I'm fully planning on it!  (And therefore posting it on this blog so I can find it easily.

Chewy Granola Bars
adapted from a Mark Bitman recipe

1/2 cup nut butter (almond or peanut)
1/2 cup honey
1 cup crispy rice cereal
1 cup oats (instant, quick or old fashioned)
1/2 chopped unsalted nuts and/or seeds (any combination you like)
1/2 cup chopped dried fruit (any that you like)
1/4 teaspoon salt (optional)

Place nut butter and honey in a small saucepan and heat over low heat just until melted enough to combine thoroughly with a whisk.

Lightly oil a 9X9 or 8X8 cake pan.
Center a piece of plastic wrap that is about 3 times the size of the pan over the pan and smooth it out to line the pan allowing the excess plastic wrap to hang over the sides.

Put the dry ingredients in a bowl. Add the combined nut butter and honey. Stir gently until well combined.
Pour mixture into pan and distribute as evenly as possible with the spoon you used to stir with.
Now fold the plastic wrap over the mixture and press firmly and evenly into the pan.

Refrigerate for at least one hour.
Lift the plastic wrap and granola mixture from the pan all at once.
Place on cutting board and cut into 16 equal pieces.

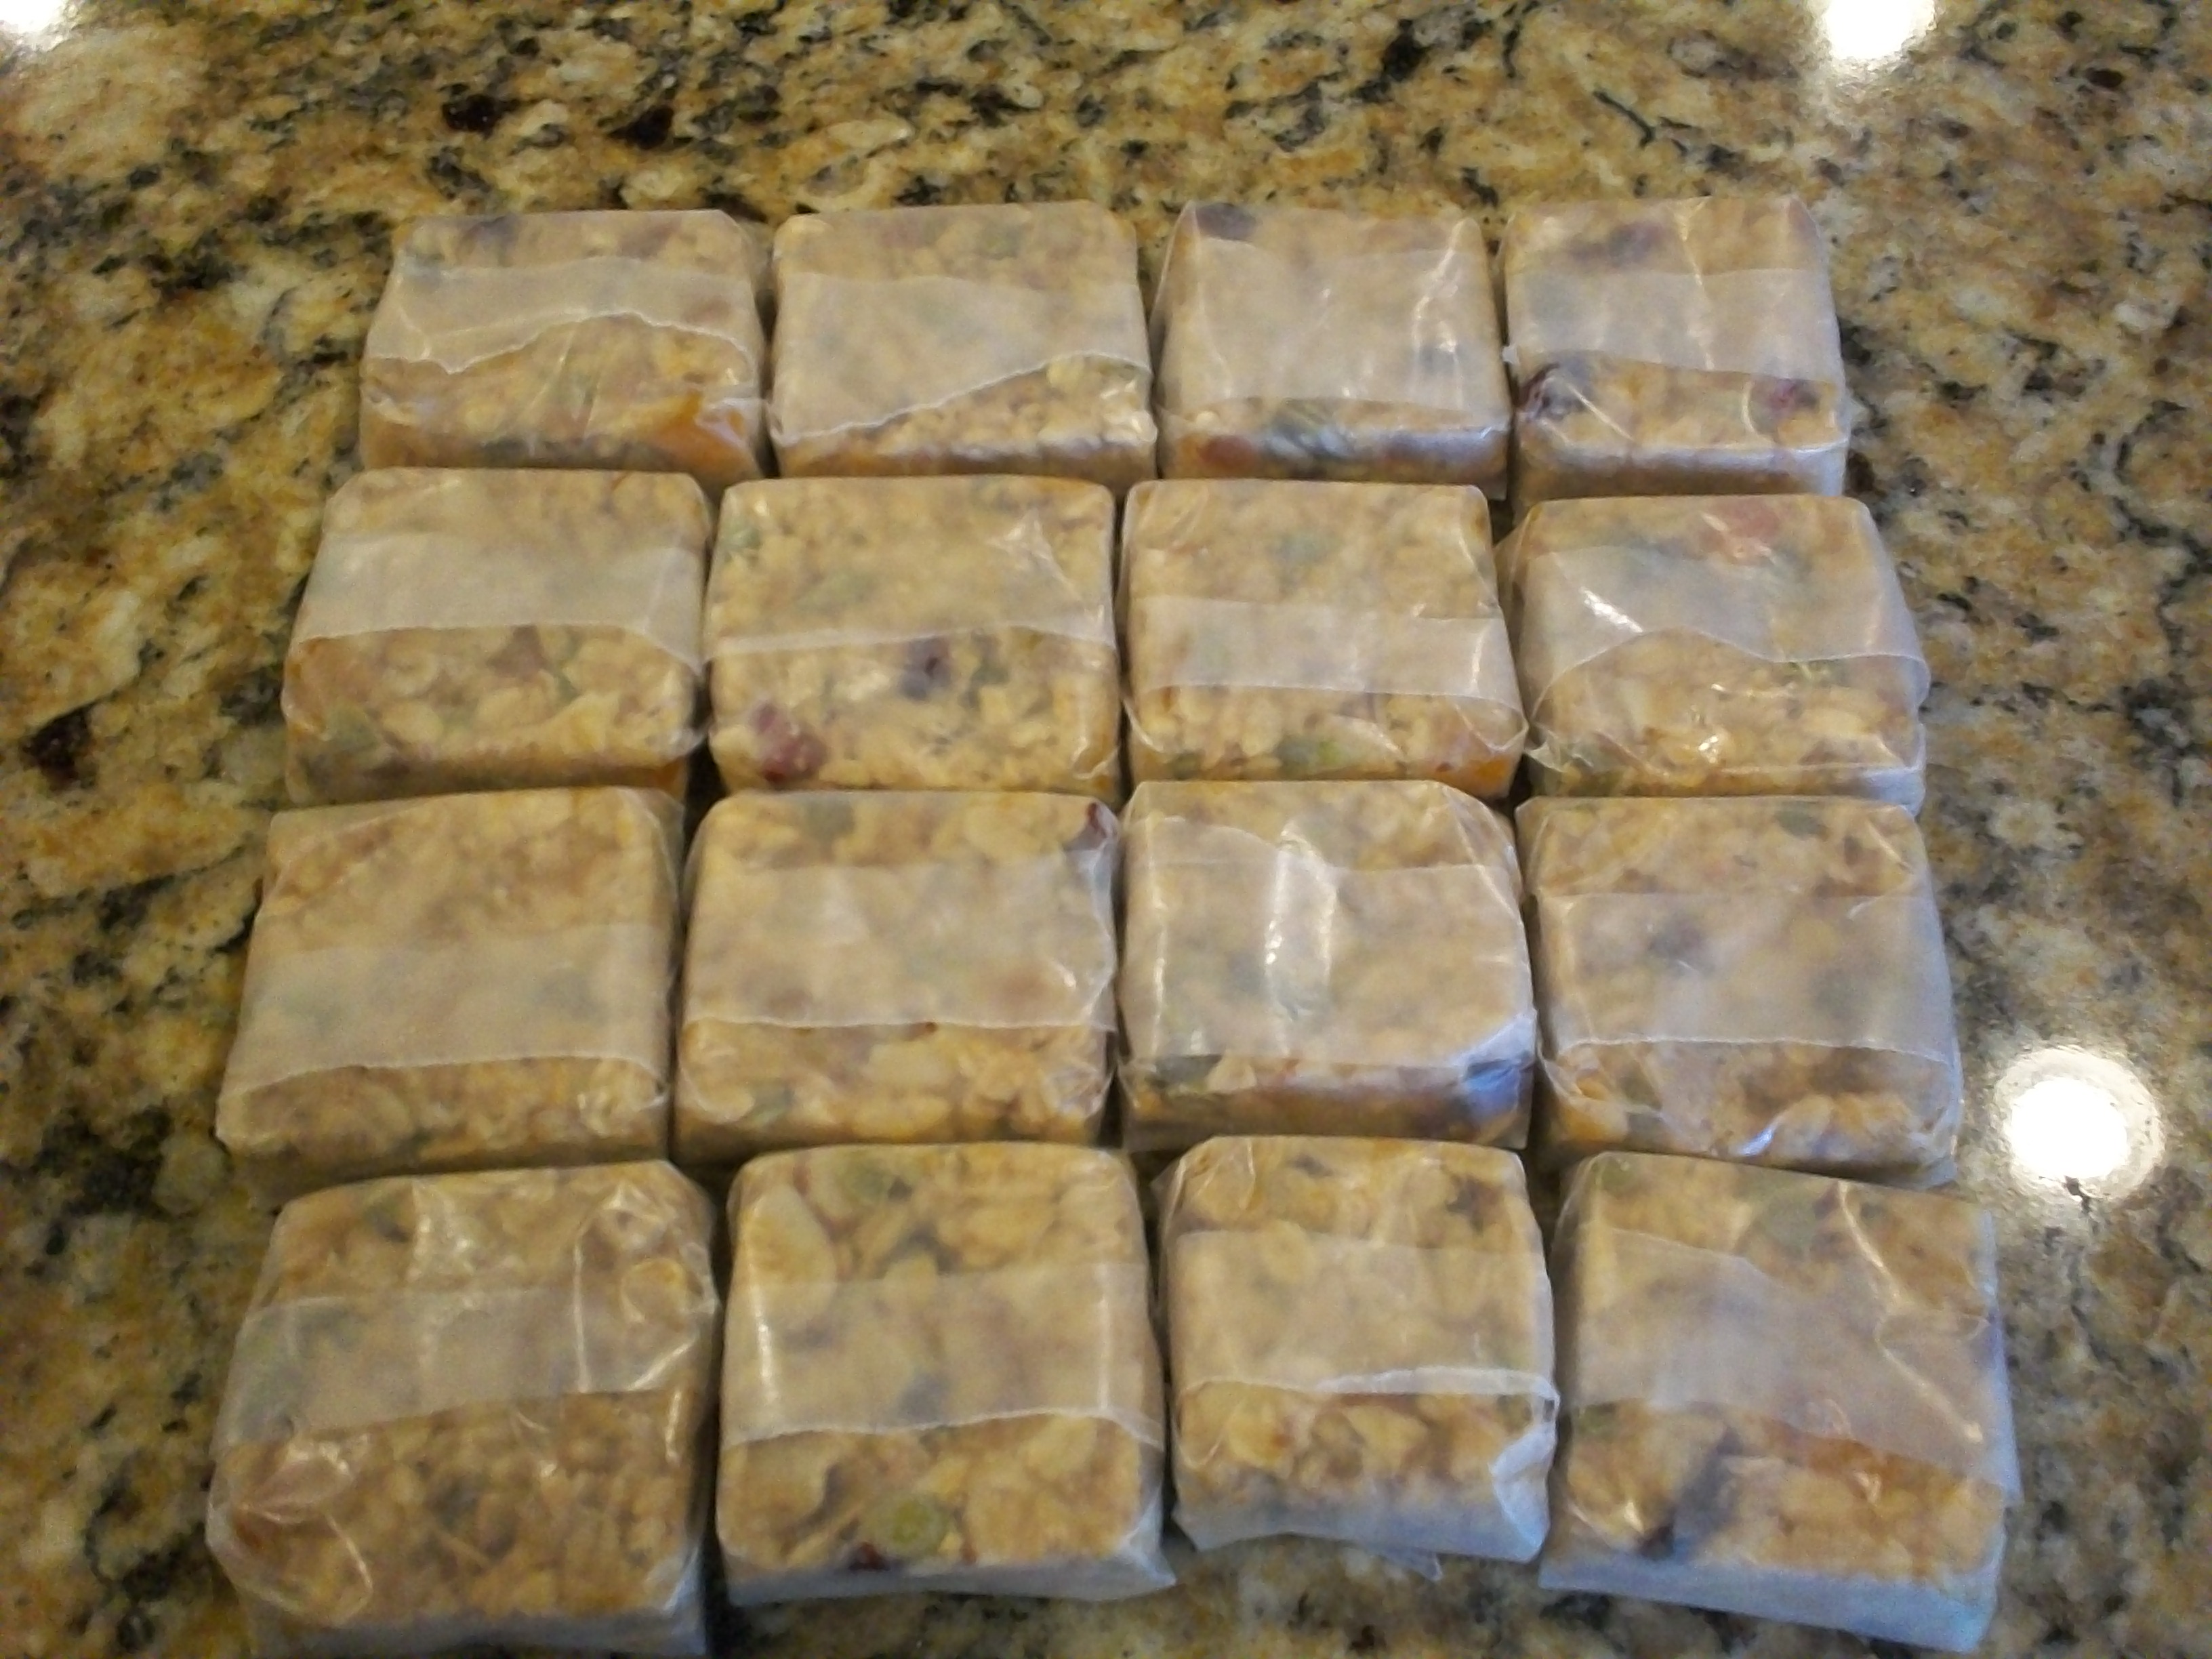
At this point I like to wrap each bar in waxed paper and put them into the freezer. When I’m packing lunches I can just grab one and add it to the lunches. It thaws perfectly for lunch.

For this batch I used natural peanut butter, almonds, raw pumpkin seeds, sunflower seeds, apricots and cranberries. YUM!


Tuesday, October 19, 2010

Homemade Pizza Crust

I had heard about this easy recipe from a fellow blogger and decided to try it last night for some yummy homemade pizza.  IT WAS SOOOOOOO GOOD!  The recipe is called "Jay's Signature Pizza Crust" and I got it off http://www.allrecipes.com/.  It has 4 1/2 stars and A TON of reviews, so it had to be good right?  Right!
And so easy!  Here is the original recipe:

Ingredients
2 1/4 teaspoons active dry yeast (1 packet)
1/2 teaspoon brown sugar
1 1/2 cups warm water (110 degrees F/45 degrees C)
1 teaspoon salt
2 tablespoons olive oil
3 1/3 cups all-purpose flour

Directions
1.In a large bowl, dissolve the yeast and brown sugar in the water, and let sit for 10 minutes.
2.Stir the salt and oil into the yeast solution. Mix in 2 1/2 cups of the flour.
3.Turn dough out onto a clean, well floured surface, and knead in more flour until the dough is no longer sticky. Place the dough into a well oiled bowl, and cover with a cloth. Let the dough rise until double; this should take about 1 hour. Punch down the dough, and form a tight ball. Allow the dough to relax for a minute before rolling out. Use for your favorite pizza recipe.
4.Preheat oven to 425 degrees F (220 degrees C). If you are baking the dough on a pizza stone, you may place your toppings on the dough, and bake immediately. If you are baking your pizza in a pan, lightly oil the pan, and let the dough rise for 15 or 20 minutes before topping and baking it.
5.Bake pizza in preheated oven, until the cheese and crust are golden brown, about 15 to 20 minutes.

Here are my add-ins:  I put in some Italian Seasoning and some garlic powder and onion powder in the yeast/oil mixture, right before adding in the flour.  It made it very savory!  I also put pieces of string cheese in the edges of the crust before baking to get that cheesy crust all the pizza places are raving about!  
 
On my homemade pizza, I just use a traditional pasta sauce (special pizza sauce is so overrated!), mozzarella, and whatever veggies and meats I have on hand.  Last night, I topped my pizza with a small can of mushrooms (drained of course), 2 sliced up LARGE tomatoes, some thick cut ham, and a red bell pepper.  I had to cook it on my pizza stone for 20 minutes because of all the juices, but it was so good!  
I ate it again for lunch.  Cold.  Straight from the fridge.  I love eating pizza leftovers!
(Sorry no pictures, my camera battery is dead and is yet to be charged.  I haven't taken pictures for 3 weeks!  lol)

Wednesday, August 25, 2010

Oreo Ice Cream Cake

I got this recipe off http://www.utahshoppingsecrets.com/.  It just looks so delish and maybe a great way to end out this summer?!  ;)  Here's the original text from the post:
Who doesn't like a delicious ice cream cake in the summertime? If you purchase ice cream cakes from stores and restaurants they are expensive. Try making your own for a fraction of the cost!

For my husband's birthday a few weeks ago I wanted to make him an ice cream cake. But I wanted an ice cream cake that didn't have cake in it (make sense)? I found this superb recipe from Kraft Foods. Just take a look at it!
Oh it was divine! And super easy to make too. It looks like you slaved over a difficult cake when really it only tool minutes to prepare. Here is the original recipe with my changes marked in red.

Oreo Ice Cream Cake

24 OREO Cookies, divided
2 cups Strawberry ice cream, softened (I used vanilla instead, and abt 3 cups)
2 cups thawed COOL WHIP Whipped Topping, divided
2 cups Chocolate ice cream, softened (3 cups also)
2 Tbsp. Hot fudge ice cream topping (I used crushed oreos instead)

LINE 9-inch round pan (I used a 10 in springform pan. Didn't have to use the plastic wrap) with plastic wrap, with ends extending over side of pan. Stand 14 cookies around edge of pan. Crush remaining cookies. Reserve 1/2 cup crumbs for later use; sprinkle remaining crumbs onto bottom of pan. Spread strawberry ice cream over crumbs; top with 1 cup COOL WHIP and reserved crumbs. Cover with chocolate ice cream.
FREEZE 4 hours.
REMOVE dessert from freezer 10 min. before serving. Use plastic wrap handles to lift dessert from pan. Carefully peel off plastic wrap; place dessert on serving plate. Let stand at room temperature to soften slightly. Top with remaining COOL WHIP; drizzle with fudge topping.

Wednesday, June 23, 2010

Apple Streusel Bars

Okay, so maybe I'm a bit addicted to www.ourbestbites.com. It must be, cause the last few recipes that I've posted here are all from there!

Even better, this recipe is SUPER easy, and you probably have all the ingredients at hand.

Seriously, these are so yummy. A friend of mine brought some over to me, and I HAD to know the recipe. Of course, it was from ourbestbites.com!

SWEET PASTRY:

2 c. flour
1/2 c. sugar
1/2 tsp. baking powder
1/2 tsp. salt
1 c. real butter, softened (no substitutions!)
1 egg, beaten

APPLE FILLING:

1/2 c. white sugar
1/4 c. flour
1 tsp. cinnamon
4 c. (about 4 medium) sliced, peeled baking apples (I used Gala, and instead of slicing, I chopped them up with my Pampered Chef food chopper)

GLAZE:
2 c. powdered sugar
About 3 Tbsp. milk (whole milk is best)
1 tsp. almond extract

To prepare crust, mix flour, sugar, salt, and baking powder in a medium bowl. Cut in butter with a pastry blender or two knives until you have pea-sized crumbles. Gently mix in beaten egg.

Spray a 9x13 baking dish with non-stick cooking spray. Gently pat about 2/3 of the crumb mixture onto the bottom of the dish. Preheat oven to 350 and set aside.

To prepare apple filling, combine flour, sugar, and cinnamon. Toss with apples and spread apples out on prepared crust. Sprinkle reserved crust mixture over apples evenly and bake in preheated oven for 40 minutes. When finished, allow to cool completely.

To prepare glaze, whisk together powdered sugar, almond extract, and enough milk to achieve desired consistency. Drizzle glaze over cooled pastry and allow to harden (you can place it in the freezer to hurry things along). Cut into bars and serve.

You'd better have someone to share these with, cause otherwise you'll eat the whole pan!

Wednesday, February 3, 2010

Baked Potato Casserole

I love twice-baked potatoes but have never actually made them. I found this recipe for potato casserole, which is basically just the easy version of twice-baked potatoes, in casserole-form (with my additions in italics).

Baked Potato Casserole (from simplifysupper.com)

6 Small baking potatoes *I used 3 regular russet potatoes
.75 cup cottage cheese *I don't like cottage cheese, so I did 1/2 cottage cheese, 1/2 cream of chicken soup
1/4 cup sour cream *I used fat free and it worked just fine
1/2 cup cheddar or favorite mixed cheeses *I used cheddar and monterey jack
1/4 teaspoon garlic salt
1/4 teaspoon paprika, optional

Scrub potatoes with a brush and pat dry. Pierce with a fork and cover each individual potato with aluminum foil, matte side facing out. Bake at 425 40 to 60 minutes, or until potatoes are tender. Allow to cool slightly until they are cool enough to handle. Cut potatoes into 1/2 inch cubes. Then add cottage cheese, sour cream, garlic salt, and paprika. Mix well and add to a greased casserole dish. Add shredded cheese to top. Bake uncovered at 325 for about 10 minutes, or until cheese is melted and golden.


It was delicious! When I showed my sister the recipe, she suggested using cream-of-whatever soup instead of cottage cheese (we both dislike cottage cheese - guess it runs in the pants!). Of course cottage cheese is slightly better for you than creamed soups, so I just decided to mix the 2 on a whim. You could still see the cottage cheese in the casserole but you couldn't taste it. And my husband suggested adding a little more sour cream because "sour cream is good on potatoes." (It was really good just how it was, but more sour cream probably wouldn't hurt either.)

Monday, February 1, 2010

Overnight Cinnamon Rolls


Yum yum! I tried yet another recipe from www.OurBestBites.com, and it was GREAT!

Dough
1 T active dry yeast (1 package)
1/2 C warm water (105 degr F--I did the scientific warm tap water method)
4 1/2 C all-purpose flour
4 large eggs
1/4 C sugar
1/2 C (1 stick) real butter at room temp

Filling
1/2 C (1 stick) real butter at room temp
3/4 C packed brown sugar
1 T cinnamon

Glaze
1 C powdered sugar
2 T butter, melted
2 T milk or cream
1 t vanilla extract

In the bowl of a stand mixer, sprinkle the yeast over the water, allow to bloom for a few minutes, then whisk until smooth. Whisk in 1/2 C of the flour. Cover with plastic wrap and let stand in a warm spot for about 30 min.

Add the eggs, sugar, butter, and remaining 4 cups flour to the yeast mixture. Fit the mixer with the dough hook and knead on medium speed until smooth 10-12 minutes (I did it MUCH shorter). Add a bit more flour to reduce stickiness if needed.

Cover with plastic wrap, set in a warm spot and let rise until doubled, about 2 hours.

While dough is rising, prepare filling. Take 2 T of the stick of butter and set aside. Beat remaining butter, brown sugar, and cinnamon together until combined and slightly fluffy, about 1 minute.

Butter a 9*13 baking dish. Transfer the dough to a floured work surface. Roll out into a rectangle about 15*10 in. Spread filling onto dough and roll up lenght-wise.

Use string or dental floss to score and cut the dough into rolls (didn't work for me, I just used a sharp knife). You can make 12 smaller rolls, 10 medium ones, or 8 large. Place cut side up in baking dish. Melt the reserved 2 T butter and brush on top of rolls. Cover tightly with plastic wrap and place in the fridge overnight (Or, I assume, bake immediately!).

The next morning remove from fridge and let rise until half again as high, about 1 hour. While rising mix glaze ingredients until combined. Preheat the oven to 350. Bake until golden brown, about 30 minutes. Let cool in the pan for 15 minutes. Spread the glaze over warm rolls and serve!!!

Tuesday, January 12, 2010

Chicken Pot Pie

Another recipe I tried from www.ourbestbites.com!!! It turned out wonderful. I also had plenty of filling left over, it wouldn't all fit in one pan, so plan on making 4 pie crusts. I put my pot pie in a small 8*8 casserole dish instead of a pie pan, and used a little bit of leftover pie crust to cover a small individual dish (that turned out great!).
Like they suggested on the website, you can make one (or two) larger chicken pot pies, or make several individual-sized ones by using prep bowls or anything small that you can put in the oven. For those little pies, you only need to cover it with a crust (you don't need to put any lining the bowl), so you'd save on crust there. It is also GREAT to freeze and reheat later! Or to take as a lunch!

Ingredients:
2 unbaked pie crusts
1 lb leftover chicken, chopped (you can use any kind of chicken really)
1 12-16 oz bag of mixed veggies, thawed
1 onion, minced
butter
5 medium potatoes (red), diced (I used regular potatoes, worked just fine)
2 cans of cream of chicken soup (or see the homemade recipe below)
1/2 tsp kosher salt
ground black pepper to taste

Instructions:
1. Preheat oven to 400
2. Bring a large pot of water to a boil. Add potatoes and boil until tender.
3. Meanwhile, heat +/- 1 tbs butter in a medium skillet. Saute the onion (and I put in my chopped raw chicken as well) until translucent and fragrant.
4. In a mixing bowl, combine cream of chicken soup, chicken, veggies, onion and potatoes. Season to taste.
5. Place 1 pie crust on the bottom of a pie plate, add filling, top w/ other crust. Crimp the edges and cut vent holes on top.
6. Place on a baking sheet and bake for 40-45 minutes or until the crust is golden brown. Allow to stand a few minutes before serving.

Serves 6-8. Enjoy!

Thursday, December 31, 2009

Homemade Cream of Chicken Soup

Have you ever run out of cream of chicken soup when you bake a casserole or make chicken pot pie? Well, I made this last night for our chicken pot pie cause I didn't have any canned stuff, and it turned out WONDERFUL! And soooooo easy!
I got this recipe off www.ourbestbites.com, great website.

Ingredients:

1 1/2 c chicken broth
1/2 tsp poultry seasoning
1/2 tsp onion powder
1/2 tsp garlic powder
1/8 tsp black pepper
1/4 tsp salt
1/4 tsp parsley
dash of paprika
1 1/2 c milk, divided
3/4 c flour

Instructions:

1. In a medium-sized saucepan, bring chicken broth, seasonings and 1/2 c of the milk to a boil.
2. In a bowl, whisk together the remaining 1 cup of milk and the flour.
3. Add to boiling mixture and whisk briskly until mixture thickens (shouldn't take long at all, mine was done almost immediately).
4. Cook until desired consistency is reached, keeping in mind that it will continue to thicken as it stands.

Makes the equivalent of 2 cans of condensed cream of chicken soup!

Wednesday, December 16, 2009

.:Holiday Baking:.

Here's what I made this year:


I've already done a tutorial/recipe for these before on my other blog (probably put them on here, too!), so just check out the link. They are super easy and really quite tasty!


** Peppermint Bark **

I used the recipe and directions found over at The Idea Room.

12 oz bag of semi-sweet chocolate chips (you could also use baking chips, bark, etc.)
1 pound white chocolate (I just used one bag of white chocolate chips - close enough to a pound!)
Candy canes
Peppermint extract

Pre-heat your oven to 250.

Line your cookie sheet with foil and spray it. (She used a 9x13 dish, which I'll talk about later in the post.)

Cover the lining evenly with your semi-sweet chocolate chips.

Bake for about 5 minutes or until they look melted.

Use a spatula to spread out your chocolate evenly. Place in the fridge to harden.

You can melt your white chocolate however you want. I always brave the microwave! I melted my chips for about 30 seconds at a time, stirring in between intervals.

Add your peppermint extract (to taste).

Pour over your hardened chocolate, and spread evenly - and quickly! It starts to harden up quickly!

Sprinkle your crushed up candy canes over the top. Place in fridge to harden.

Remove the foil from the cookie sheet and shake off the excess candy. Cut your bark however you'd like.

Sooo....I didn't do so well with my first batch of bark. I didn't spread my white chocolate quickly enough, so not a lot of candy stuck to it. (As you can see!) I decided to give it another try doing it with 9x13 dishes.

This worked great. I also put my candy in a strainer and let the powder go through into my melted white chocolate, along with the peppermint extract. I like the look and the taste this gave my bark. Then the larger pieces are what I sprinkled on top.

Now, I had a problem with both of my batches. When I cut the bark, almost always my two layers of chocolate would separate. I know the white layer alone will taste delicious, and I also know that people can just hold the two layers together as they eat it. But why would it not stick together??? Can someone help me out? I was so frustrated that I about swore off ever making bark again!

** Chocolate Candy Cane Whoopie Pies:.

My mom posted this recipe on her blog a week or two ago, and I decided to put my own spin on it.

I decided to make cake mix cookies instead of cookies from scratch. Call me lazy if you want (I also used canned frosting!) but I also really love cake mix cookies.

So here's what you need:

Cake mix
1/2 c. oil
2 eggs
frosting
crushed candy canes
peppermint extract
Andes baking bits (optional)

Pre- heat your oven to 350.

Mix your cake mix, oil, and eggs.

Stir in your baking bits. (I LOVE these candy cane bits!)

Put scoops of dough on your cookie sheet.

Bake for 10-12 minutes.

Let your cookies cool completely before adding frosting!

I mixed peppermint extract and red food coloring into my canned vanilla frosting. I just add extract to taste.


Frost one cookie and then roll the edges in the crushed candy canes. My mom's recipe says to frost the cookie and place the other cookie on top to make a sandwich before rolling the edges, but I found it easier to roll the edges before the second cookie was added.

Add your other cookie on top.

DONE! And delicious!

I also made another batch with just regular Andes baking bits - not the candy cane ones, but the chocolate and mint ones. For those, I used chocolate frosting instead of the peppermint frosting, and still rolled the edges in candy canes. Yum!


Tuesday, October 27, 2009

Chicken, Spinach, Mushroom Quesadillas

These turned out to be quite delicious and simple! All you need is tortillas, chicken (I boiled mine and shredded it), cheese, mushrooms, spinach leaves, and tomatoes (opt.)
Combine all of the ingredients into the tortilla.
And then I used my george foreman to grill them. Yum in the tum!

Friday, October 23, 2009

Moist Banana Bread

I've been wanting to make this for a while, cause we always have overripe bananas lying around that I end up throwing away. I found this recipe online (google search, don't know where), I was looking for one that was relatively healthy but still moist. I heard substituting the butter for applesauce is a good idea too, but I didn't do that.

2 cups plain flour
1 1/4 tsp baking soda
pinch of salt
2 eggs (beaten)
1/2 cup brown sugar
1/2 cup butter
2 cups mashed overripe bananas (about 3 bananas)
1/2 cup vanilla yogurt
1 tsp vanilla
Optional for topping: sliced bananas, 1/2 tsp cinnamon, 1/2 tsp sugar
Optional for filling: 1/2 cup of walnut pieces, 1/2-1 cup of chocolate chips

1. Preheat oven to 350F. Grease and flour a loaf pan.
2. Cream together the butter and sugar. Add the eggs, vanilla, yogurt and mashed bananas and mix well.
3. Slowly stir in the flour, a little at a time. Then mix in the baking soda and salt, mixing thoroughly. (Opt) Fold in the walnuts or chocolate chips. (I chose walnuts)
4. Pour mixture into loaf pan. If too stiff, add more yogurt and mix well. Only add in a little at a time.
5. (Opt)Place banana slices on top of the mixture in the pan and then sprinkle with cinnamon and sugar (I just did the cinnamon sugar, yum!)
6. Bake in the center of the oven at 350F for +- 60 min, checking by inserting a knife or toothpick in center until it comes out clean. (Mine took 60 min exactly)
7. Allow to cool for 10 minutes before placing on wire rack.

The best thing for these kinds of breads is to leave them overnight covered in seran wrap after they cool. It seems they become more dense and moist this way!

Sorry I'd have a picture but our bread is almost all gone already! ;)

Thursday, October 22, 2009

.:Pumpkin Muffins:.

My sister gave me this recipe a couple of falls ago, and it has become a traditional favorite at our house! This recipe makes a TON, so I usually do half of it with butterscotch chips and the other half with chocolate chips. They are a great visiting teaching or neighbor gift, or even just to freeze for later, and believe me, you'll have plenty to go around!

INGREDIENTS

3 c pumpkin (be sure not to get the pie filling!)
1 1/2 c vegetable oil
4 c sugar
6 eggs
4 3/4 c flour
1 1/2 t baking powder
1 1/2 t baking soda
1 1/2 t salt
1 1/2 t cinnamon
1 1/2 t nutmeg
1 1/2 t cloves
1 pkg. butterscotch chips (or chocolate chips - or both!)

Pre-heat your oven to 350.

Mix the pumpkin, oil, sugar and eggs.

In a separate bowl, combine all of the dry ingredients (except the chips) and mix.

Stir in with the pumpkin mix.

Stir in chips. (Be sure to set aside half of your batter if you are choosing to do half butterscotch chips and half chocolate chips.)

Line your muffin tin (if you are a liner sort of baker - I despise cleaning out muffin tins, so I always have to line mine!) Fill 2/3 full with batter.

Bake 18-20 minutes. (My oven is more on the 25 minute side, and they were still very moist and soft!)

Monday, October 19, 2009

.:Fluffy French Toast:.

We are having this for dinner tonite so I thought I would share!

FLUFFY FRENCH TOAST

1/4 c flour
1 c milk
1 pinch salt
3 eggs
1 t vanilla
1/2 t cinnamon
1 T white sugar
12 thick slices of bread (Texas Toast works great, but we're using Grandma Sycamore bread tonite)

* Mix all ingredients together

* Soak both sides of bread

* Cook on griddle on medium heat

Tuesday, October 13, 2009

Cheesy Potato Soup (w/ bacon)

I got this award-winning recipe from my friend Bethany. I made it tonight. It feeds 6-8 people (or more, it is so rich!) and is also great in a bread bowl.

In large pot combine:

4 cubes or 2 Tbs. granules Chicken bouillon
3 Cups hot water
5 cups diced potatoes
1 cup diced celery
1 cup chopped carrots
½ cup chopped onion
Cook above ingredients until tender.

In second pan melt butter and whisk in flour. Add the half and half and mix until smooth. Add Velveeta and grated cheese and mix until smooth and then add to vegetables.

¾ cup butter
¾ cup flour
8 oz cubed Velveeta
4 cups half and half
½ cup grated cheddar cheese

Directions:
You can add milk to it after it is all cooked to make it a little thinner and it helps make it not as rich tasting.
I also added about 8 slices of bacon, cut up and cooked, as I mixed everything together. Good stuff.

Enjoy the yum-yums!

Wednesday, September 23, 2009

Ruth's Casserole

Named Ruth's Casserole after my great grandmother, Ruth, whose recipe this is. Some people say it's like Shepherd's Pie, my husband called it Poor Man's Casserole, or Peasant Casserole...anyway, seems like a fairly popular recipe, and this is just one variation, but I love it and always have.

1 lb ground beef
3-4 potatoes (I usually use russet, but used red tonight and they worked just great)
1-2 cans green beans (My mom always used 2, I always use 1. I think 1 is plenty)
2 cans tomato soup (or, as discovered tonight, 1 can tomato soup and some milk. Not as flavorful, but still yummy)

Brown the beef while cooking the potatoes, either by boiling or in the microwave. Once they are cooked, peel (optional) and chop potatoes (bite-size chunks, not super small). Combine all ingredients and eat!

Makes 3-5 servings

Tuesday, September 22, 2009

Coconut Curry Chicken!

Oh my yummy goodness! I made this for dinner tonight and just had to share! I got it off the Utah Deal Diva blog, and is way cheap to make!


Ingredients:
1 lb boneless skinless chicken breasts (about 2 large breasts)
1 1/2 tablespoons vegetable oil (I used a little more)
1 1/2 tablespoons curry powder
1/2 onion, thinly sliced
2 cloves garlic, crushed
1 (14 ounce) can coconut milk
1 (14.5 ounce) can stewed, diced tomatoes
3 tablespoons sugar
salt and pepper to taste

Directions:
1. Assemble ingredients
2. Dice onion & cut up chicken. Season chicken with salt & pepper.
3. Heat oil in large skillet over medium-high heat for 2 minutes. Add curry and mix thoroughly. Let flavors meld for an additional 2-3 minutes, stirring occasionally.
4. Stir in onions and garlic, and cook 1 minute more. Add chicken, tossing lightly to coat with curry oil. Reduce heat to medium, cook for 5-7 minutes, till chicken is mostly cooked through.
5. Transfer mixture to heated crockpot. Add coconut milk, tomatoes and sugar, stir. Cover and cook on low for 2-3 hours.
6. Cook 2 1/2 cups of rice according to package directions. Serve sauce over rice. Enjoy!

This makes 6 servings at only $.63 per serving!

Butternut Squash Soup

Autumn is in the air, and you couldn't get more Fallish than cooking a warm bowl of this little number. My friend made this the other day and people in the neighborhood could even smell its yummy goodness. I am going to try it later this week!

3 Leeks (white part only) sliced
4 med carrots chopped
5 TB butter
3 lbs butternut squash peeled and cubed
6 C. chicken broth
3 med zucchini peeled and sliced
1/2 tsp. dried thyme (If you don't have this on hand it is fine)
1/4 tsp. pepper
1 1/2 C. half & half
grated parmesan or cheddar cheese


Over med heat, saute the leeks and carrots in butter approx. 5 min. stirring occasionally. Add squash, broth, zucchini thyme and pepper; bring to a boil. Reduce heat cover and simmer until veggies are tender (about 30 min) Cool to luke warm. Puree in blender or food processor until smooth. Add cream, mix well and heat thoroughly but don't boil. Garnish with cheese. Makes 12 servings and freezes well!

Wednesday, September 16, 2009

.:White Chocolate Cheesecake Cookies:.

I saw this recipe on a local T.V. program the other day, and visiting teaching gave me the perfect excuse to try it out!

Ingredients:
  • 1 cup brown sugar
  • ¼ cup white granulated sugar
  • 3 eggs
  • 1 tsp vanilla
  • ½ cup shortening
  • ¼ cup butter or margarine softened
  • ¼ cup white chocolate chips melted
  • 3 cups flour
  • 1 tsp baking soda
  • ½ tsp salt
  • 1 ½ cups white chocolate chips
  • 8 oz package cream cheese softened
  • ¾ cup powdered sugar
  • 1 tsp vanilla
  • 1-2 Tbsp milk
  • 1 can cherry pie filling (I used raspberry because I'm not a fan of cherry pie filling)
Heat oven to 350 degrees.

Combine sugars, shortening, butter, eggs, and vanilla in a bowl. Beat until it is blended well.

Melt 1/4 cup white chocolate chips in the microwave.

Add to the bowl and beat until creamy.

Add flour, soda, and salt. Beat until a soft dough forms.

Hand stir in 1 1/2 cups white chocolate chips.

In a separate bowl, combine cream cheese, powdered sugar, and vanilla until creamy.

Stir in milk until it is absorbed.

Drop spoonfuls of dough on to cookie sheet.

Make an indention with the tip of your finger or a spoon.

Drop a teaspoon of the cream cheese mixture into each indention.

Bake for 10-12 minutes. (Mine were more on the 12 side).

Let the cookies cool for 1-2 minutes before removing from the cookie sheet.

Allow cookies to cool and spoon on your filling.

Store in the fridge!